Condo Care · Toronto & The GTA
Condo heat pump leaks.
Start below the coil.
Drain pan care, overflow sensors and the shared condensate riser. Understand where water comes from—and what helps keep it under control.
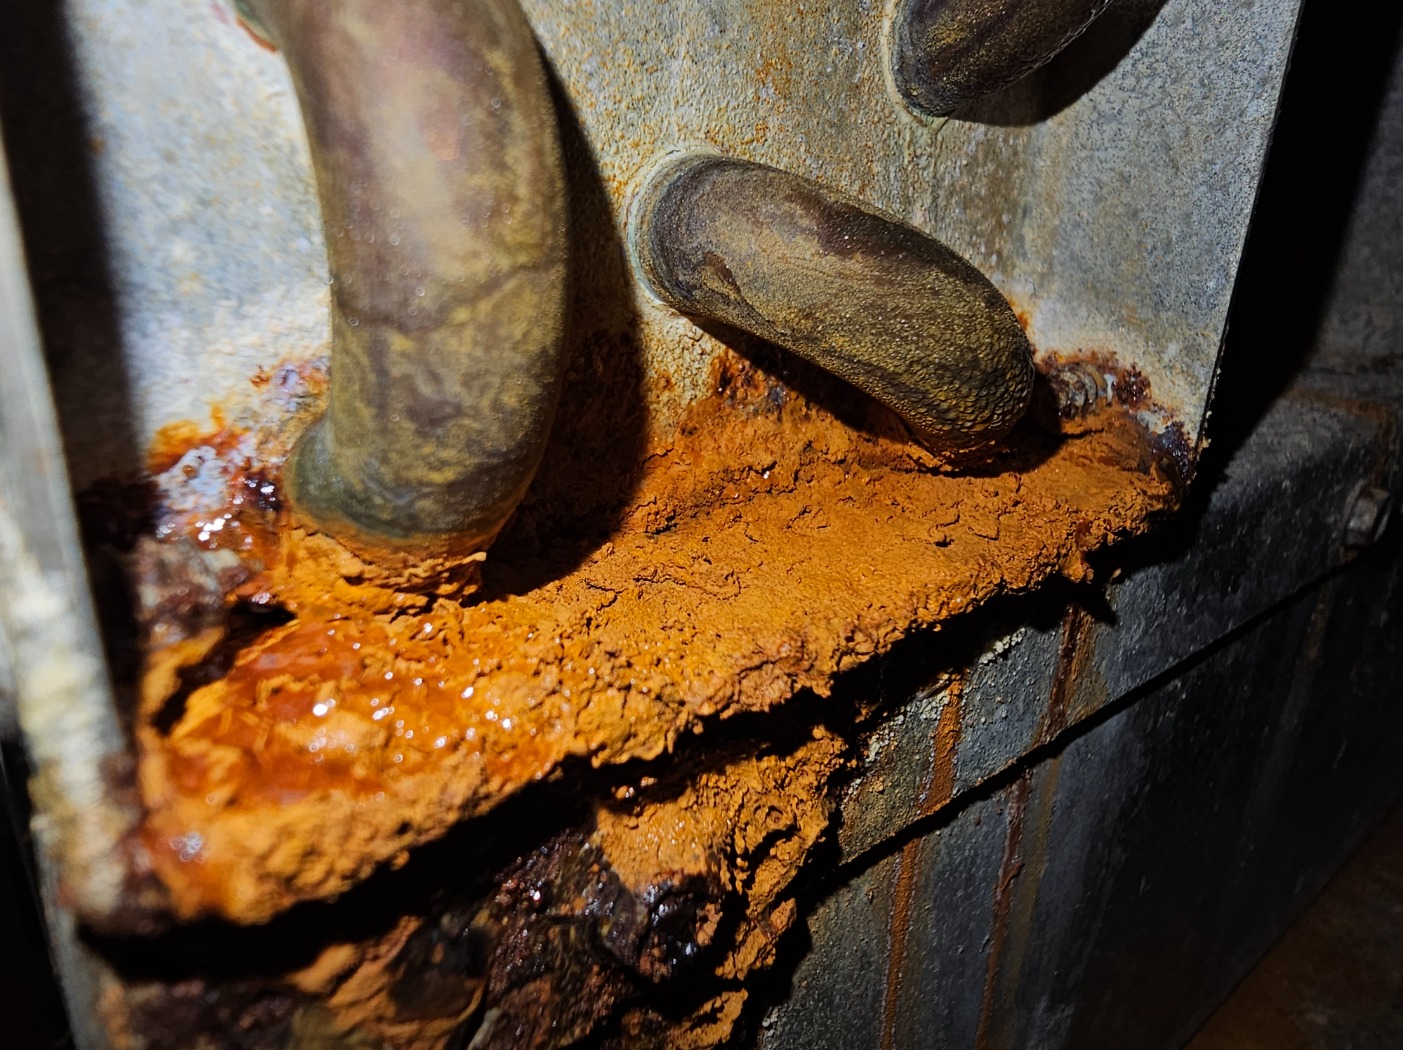 Original HTS field photography
A heat pump can still cool your condo while a drainage problem develops out of sight.
During cooling, moisture collects on the cold coil and drips into the drain pan. It should leave through the local drain connection and, in many condo buildings, continue into a shared vertical condensate line. A problem anywhere along that route can leave water inside the cabinet or on the floor.
Rust in the pan matters, but it is only one part of the investigation. Ice buildup, restricted airflow, a failed condensate pump, a shared riser backup or a leaking pipe can produce similar symptoms. The repair needs to address the actual source.
01 · Find The Source
Similar leaks.
Different causes.
These HTS photos show two conditions worth investigating. A photo can document damage; an inspection establishes why it happened.
HTS · Field PhotographyCorrosion & loose debris
Flaking material can collect at the drain opening. Cleaning reveals the remaining metal condition; severe deterioration may require replacement.
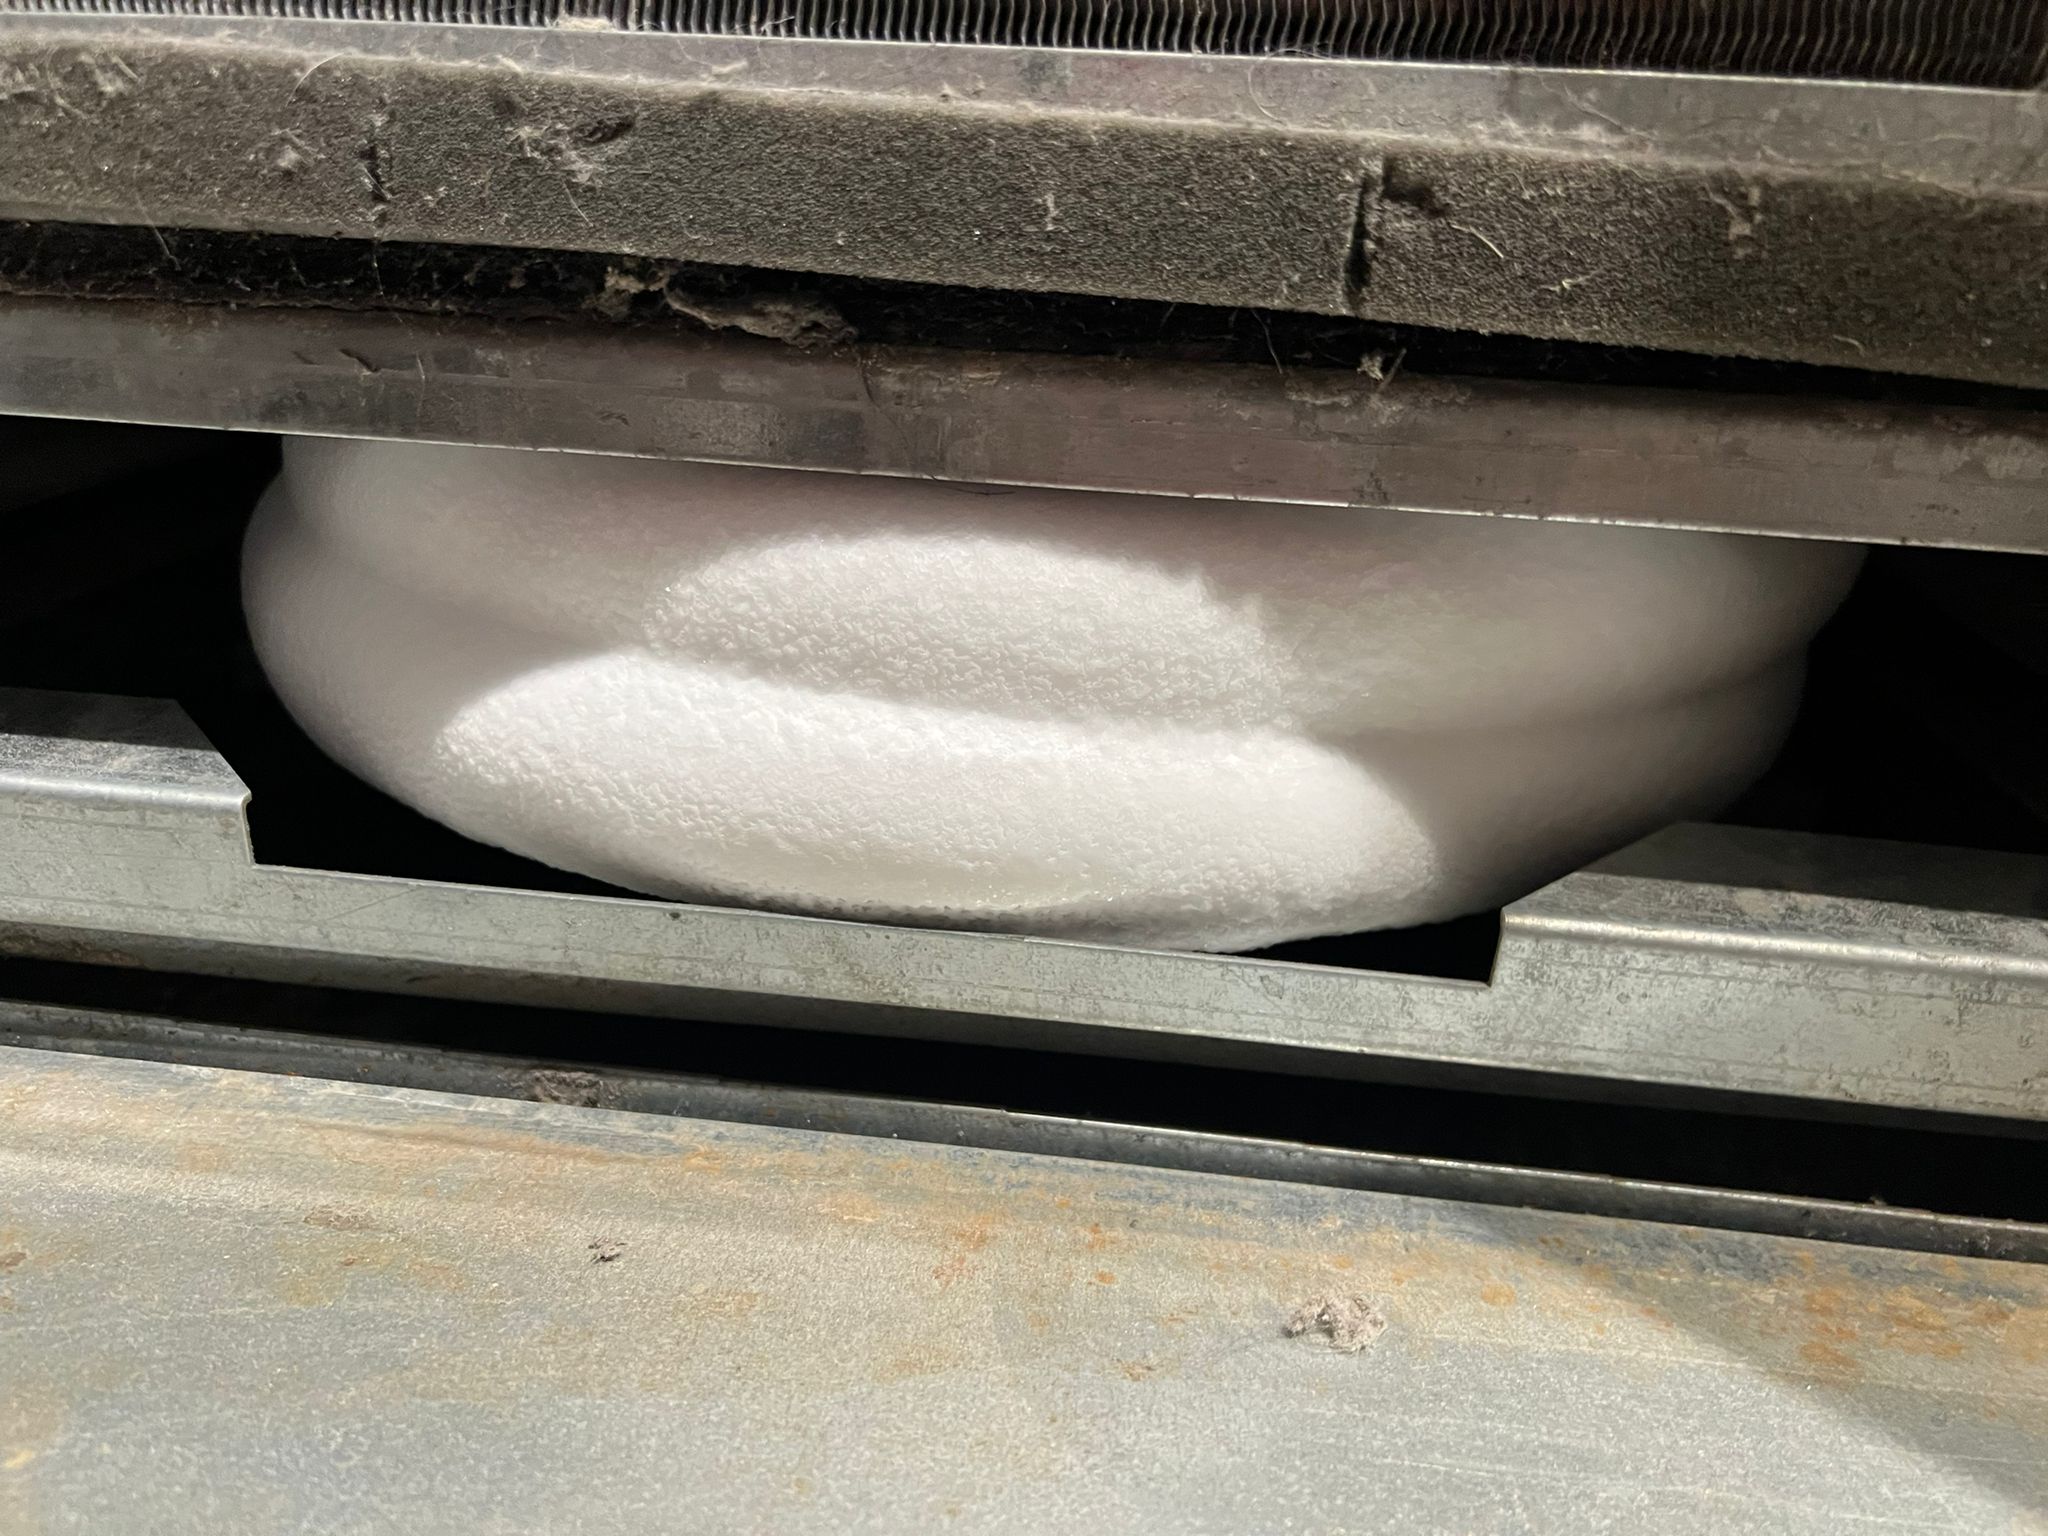 HTS · Field Photography
Ice that becomes water
When accumulated ice thaws, water can spill outside the normal collection path. The cause of freezing still needs to be corrected.
A blocked local drain
Sludge, dust and corrosion debris can restrict the drain opening, trap or suite connection. Water may rise in the pan even when the pan itself is intact. The accessible path needs cleaning and a controlled drainage check.
A deteriorated drain pan
Corrosion, cracked seams or perforations can let water escape before it reaches the drain. A clear drain will not repair failed metal. Restoration is an option only where the remaining pan is structurally sound.
Ice buildup on the coil
Restricted airflow, blower problems or refrigerant issues can cause a heat pump’s evaporator coil to freeze. Thawing ice may continue to release water after cooling stops. Do not chip the ice or restart cooling before the cause is checked.
A blocked filter or air path
A dirty or unsuitable filter can reduce airflow enough to contribute to coil icing. Blocked return grilles and dirty coils can have a similar effect. Filter replacement helps restore airflow, but repeated freezing needs further diagnosis.
Condensate pump failure
Some installations use a small pump where gravity drainage is unavailable. Loss of power, a stuck float, motor failure or a blocked discharge can leave its reservoir full. A technician should test the pump, discharge route and any high-water shutdown switch.
A backup in the vertical condensate line
A restriction farther down a shared stack can cause water from connected equipment above to back up toward suite branches. Your pan may overflow even when your own heat pump is off. See how shared backups develop ↗
Pipe, hose or connection failure
Water can come from a deteriorated flexible hose, leaking fitting, valve or coil connection on the pressurized building water circuit. These leaks require assessment of the failed component and safe isolation. A condensate sensor does not automatically close the water supply.
02 · Airflow & Maintenance
The filter belongs
in the leak investigation.
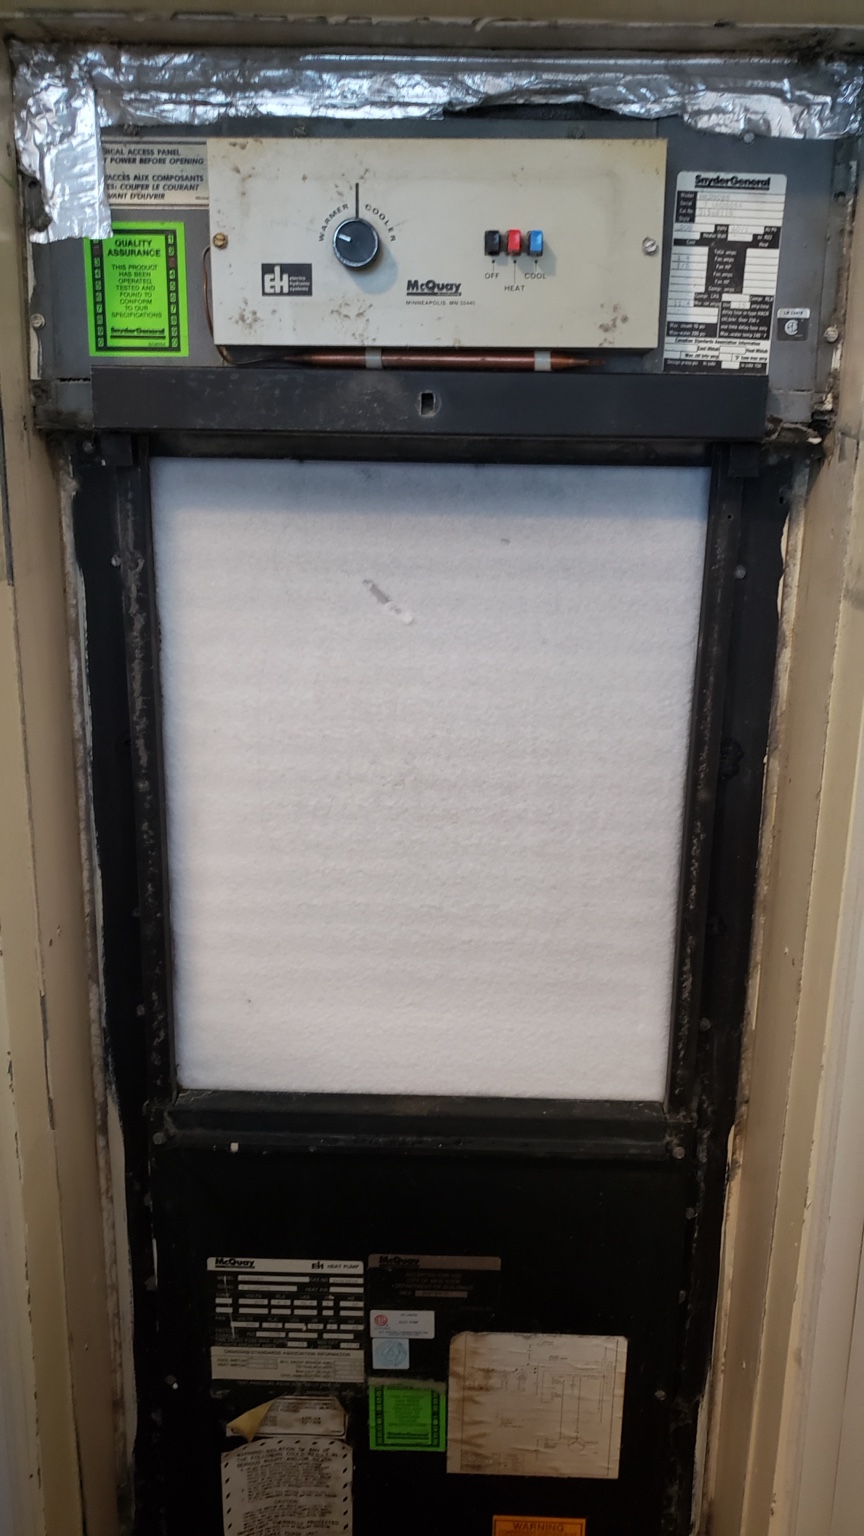
A filter does more than collect dust. Air must pass through it and across the coil for the heat pump to operate properly. As resistance increases, cooling performance can fall and icing may develop.
Use the filter size and type specified for the equipment. Keep return and supply grilles clear, and have the filter, blower, coil, pan and accessible drain reviewed together during maintenance.
The unit photo shows filter placement and access. It is not presented as evidence that this filter caused a leak.
Explore condo HVAC maintenance ↗03 · Overflow & Audible Flood Sensors
Detect water.
Stop cooling.
Raise the alarm.
A correctly selected and wired sensor can shut down the operation producing condensate when abnormal water is detected. An audible alarm adds a local warning so someone can respond.
Ask about flood sensor installation ↗How thermostat shutdown works
On compatible equipment, a technician can wire the sensor to interrupt the low-voltage power feeding the thermostat or the appropriate cooling control circuit. When it trips, the intended cooling operation stops, reducing further condensate production and helping prevent continued overflow from that unit.
The wiring depends on the heat pump or fan coil controls. Some thermostats retain a display through batteries or a separate supply, so a blank screen is not a reliable test. The technician must confirm that the equipment actually responds as intended.
Audible warning needs the right connection
An audible flood sensor with a compatible shutdown relay—or a moisture sensor connected to a separate alarm—can both sound an alert and interrupt cooling. A standalone battery-powered water alarm only makes a sound unless it is specifically designed and connected to control the HVAC system.
| Device | What it detects | What happens |
|---|---|---|
| Overflow float switch | Water rising at the installed pan or drain location. | Interrupts the connected control circuit when the float reaches its trip level. |
| Electronic moisture sensor | Water reaching its sensing surface. | Can shut down connected equipment; an alarm output depends on the model. |
| Audible sensor with interlock | Water at the sensor location. | Sounds a warning and stops the connected cooling operation when designed and wired for both. |
| Standalone audible alarm | Water contacting the detector. | Alerts nearby occupants. It does not inherently shut down the thermostat. |
Installation includes a real test.
Position the device where it can detect the intended leak or rising water. Check compatibility, simulate activation, verify shutdown and any audible alarm, and confirm the required reset procedure. Keep sensors accessible for testing and maintenance.
Know what shutdown cannot stop.
Residual water and melting ice can continue draining after shutdown. The sensor cannot clear a blockage, repair a pan or hose, or stop water arriving from a shared riser. If it trips, leave cooling off, report the event and have the cause corrected before resetting.
04 · The Shared Condensate Riser
The blockage may
be below your suite.
The vertical condensate line serves a different purpose from the building’s heating and cooling water risers. It carries drainage from connected equipment down through the building.
Explore Condensate Riser Cleaning & Drainage Services ↗Over time, debris, corrosion particles and biological buildup can restrict a shared condensate stack or a downstream connection. When incoming water exceeds what the restricted section can carry, the water level can rise upstream and back up toward connected branches.
Where that water appears depends on the piping layout and the location of the restriction. It may emerge through a lower connected pan or drain connection, while the water was produced by equipment on floors above.
Turning off one heat pump does not stop other suites from sending water into the shared line. An overflow interlock can stop your unit’s contribution, but a common-stack problem still needs building coordination.
Clues that warrant a wider investigation
- Water continues with the affected unit switched off.
- Leaks return after the accessible suite drain is cleared.
- Suites on the same vertical line report related incidents.
- Water rises from a drain connection or overflows at the pan.
These are clues, not proof. Pressurized piping leaks and other water sources must also be ruled out.
What a coordinated scope should cover
Review affected floors, drawings, available clean-outs and service access. Define the cleaning method, protection of connected cabinets and collection of loosened debris. Where needed, coordinate access to adjacent floors or equipment removal.
Finish with drainage checks appropriate to the accessible route and record remaining concealed limitations. Cleaning a local branch alone does not confirm that the entire vertical line is clear.
05 · Drain Pan Cleaning & Restoration
A cleaner pan.
A verified path for water.
Restoration starts with access and assessment. The field video shows loose debris being removed—one stage of the work, before any final treatment or drainage test.
Inspect the complete local path.
Check the accessible pan, outlet, trap and suite connection. Look for corrosion, standing water, ice and active leaks at pipes or hoses. Confirm whether a pump is installed.
Expose and remove loose material.
Some installations require chassis removal and verified isolation. Remove accessible debris while protecting the cabinet and connected drainage route. Do not simply push material into a shared stack.
Restore only suitable surfaces.
Assess the cleaned pan for holes, weakened seams and metal loss. Use a compatible protective finish only on sound material and follow preparation and curing instructions. Severe deterioration may require repair or replacement.
Test drainage and protection.
After the work and any required curing, check local drainage under controlled conditions, inspect for leakage and test installed sensors. Record what was serviced and any further suite or building work required.
06 · Planning Your Budget
Clear scope.
Clearer pricing.
Indicative Toronto & GTA ranges for individual suites. All amounts are in CAD, before HST.
| Service | Planning range |
|---|---|
| Inspection & leak diagnosisAssessment of the pan, visible water source and accessible drainage. | $180–$300 |
| Accessible pan & suite drain cleaningLocal cleaning where the affected components can be reached. | $250–$500 |
| Drain pan restorationDeeper cleaning, suitable protective treatment and more involved access. | $350–$900or more |
| Overflow switch installationBasic compatible switch, installation and functional testing. Audible alarm and additional controls quoted separately. | $200–$350 |
| Audible flood sensor with shutdown interlockWater detection, audible notification and compatible control integration. | Quoted afterassessment |
| Vertical condensate riser investigation & cleaningShared drainage, access planning and coordinated suite protection. | Building-specificquote |
Use these as budget estimates, not a fixed quote or a measured market average. Scope may overlap between services; the rows should not automatically be added together. Confirm diagnostic charges and what the written quote includes.
Chassis removal, difficult access, failed isolation valves, severe corrosion and concealed drain work can change the price. Pan replacement and common stack cleaning require separate assessment. Coordinated building programs are quoted to their own scope.
For Property Managers & Boards
Connect the findings
across the building.
A practical leak prevention program brings together pan condition, filter and coil maintenance, pump operation, sensor testing and shared condensate drainage. Each measure addresses a different part of the risk.
Track the affected suite, time of the event, operating status, sensor activation and any related incidents on connected floors. Those details help distinguish repeat local faults from a shared drainage problem and support a defined repair scope.
Coordinate access and confirm maintenance responsibilities through management. Inspection frequency should reflect equipment instructions, operating conditions and leak history.
Review our condensate riser services ↗A Few Common Questions
Good questions.
Practical answers.
Does a flood sensor cut power to the thermostat?
Will shutting off cooling prevent every overflow?
Why is the heat pump leaking when it is off?
Can a blocked filter cause a water leak?
Does every condo heat pump have a condensate pump?
Will cleaning my drain pan clear the building riser?
Can a rusty drain pan be restored?
What should I do when a flood sensor activates?
Home Trade Standards · Condo HVAC Specialists
Find the source.
Protect the next cooling cycle.
From a single heat pump to a shared condensate riser,
start with a clear assessment and a defined scope.